CentOS搭建Express Node.js Web

Express 是一个基于 Node.js 平台的极简、灵活的 web 应用开发框
架,帮助开发者快速的搭建 web 应用。
安装Node.js
[root@localhost ~]# curl --silent --location https://rpm.nodesource.com/setup_8.x | sudo bash -
[root@localhost ~]# yum -y install nodejs
[root@localhost ~]# node -v
v8.17.0
安装Express
创建工作目录
[root@localhost ~]# mkdir -p /data/release/hello
[root@localhost ~]# cd /data/release/hello/
# 初始化项目
[root@localhost hello]# npm init安装express
安装并保存到依赖中
[root@localhost hello]# npm install express --save创建测试数据
创建cyj.js
[root@localhost hello]# vim cyj.js
var express = require('express');
var app = express();

app.get('/', function (req, res) {
  res.send('Hello World!\n');
});

var server = app.listen(3000, function () {
  console.log('Example app listening on port 3000!');
});
上面的代码启动一个服务并监听从 3000 端口进入的所有连接请求。他将对所有 (/) URL 或 路由 返回 “Hello World!” 字符串。对于其他所有路径全部返回 404 Not Found 。
启动应用
阻塞
[root@localhost hello]# node cyj.js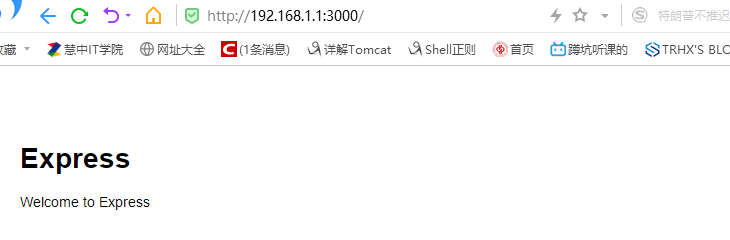
Example app listening on port 3000!访问192.168.1.1:3000
[root@localhost ~]# curl 192.168.1.1:3000
Hello World!
Express应用生成器
安装Express应用生成器
通过应用生成器工具 express 可以快速创建一个应用的骨架。
[root@localhost hello]# npm install express-generator -g创建项目myapp
[root@localhost hello]# cd /data/release/
[root@localhost release]# express myapp
查看项目中的结构
[root@localhost release]# cd myapp/
[root@localhost myapp]# tree
.
├── app.js
├── bin
│?? └── www
├── package.json
├── public
│?? ├── images
│?? ├── javascripts
│?? └── stylesheets
│??     └── style.css
├── routes
│?? ├── index.js
│?? └── users.js
└── views
    ├── error.jade
    ├── index.jade
    └── layout.jade
启动应用
# 安装应用依赖包
[root@localhost myapp]# npm install
# 启动应用
[root@localhost myapp]# DEBUG=myapp npm start访问192.168.1.1:3000
基本路由
Express 路由简介
路由(Routing)是由一个 URI(或者叫路径)和一个特定的 HTTP 方法(GET、POST 等)组成的,涉及到应用如何响应客户端对某个网站节点的访问。
每一个路由都可以有一个或者多个处理器函数,当匹配到路由时,这些函数将被执行。
路由的定义由如下结构组成:
app.METHOD(PATH, HANDLER)其中:
app是一个 express 实例;METHOD是某个 HTTP 请求方式 中的一个PATH是服务器端的路径;HANDLER是当路由匹配到时需要执行的函数。
一个简单的Express路由
修改hello项目
[root@localhost hello]# vim cyj.js
var express = require('express');
var app = express();

app.get('/', function (req, res) {
  res.send('Hello World!\n');
});

// 网站首页接受 POST 请求
app.post('/', function (req, res) {
  res.send('Got a POST request\n');
});

// /user 节点接受 PUT 请求
app.put('/user', function (req, res) {
  res.send('Got a PUT request at /user\n');
});

// /user 节点接受 DELETE 请求
app.delete('/user', function (req, res) {
  res.send('Got a DELETE request at /user\n');
});

var server = app.listen(3000, function () {
  console.log('Example app listening on port 3000!');
});
启动应用
[root@localhost hello]# node cyj.js
Example app listening on port 3000!
测试
[root@localhost ~]# curl -X POST http://192.168.1.1:3000
Got a POST request
[root@localhost ~]# curl -X PUT http://192.168.1.1:3000/user
Got a PUT request at /user
[root@localhost ~]# curl -X DELETE http://192.168.1.1:3000/user
Got a DELETE request at /user
静态文件
利用 Express 托管静态文件 通过 Express 内置的 express.static 可以方便地托管静态文件,例如图片、CSS、JavaScript 文件等。
创建静态目录文件
[root@localhost ~]# mkdir /data/release/hello/public^C
[root@localhost ~]# cd /data/release/hello/public/
[root@localhost public]# vim hello.html
<!DOCTYPE html>
<html lang="en">
<head>
  <meta charset="UTF-8">
  <title>Document</title>
</head>
<body>
  <h1>Hello World</h1>
</body>
</html>
修改应用cyj.js
[root@localhost public]# vim ../cyj.js
var express = require('express');
var app = express();

app.use(express.static('public'));

var server = app.listen(3000, function () {
  console.log('Example app listening on port 3000!');
});
在 cyj.js 中将静态资源文件所在的目录作为参数传递给 express.static 中间件,这样就可以提供静态资源文件的访问了。
启动应用
[root@localhost hello]# node cyj.js
Example app listening on port 3000!访问http://192.168.1.1:3000/hello.html

指定路径
如果你希望所有通过 express.static 访问的文件都存放在一个“虚拟(virtual)”目录(即目录根本不存在)下面,可以通过为静态资源目录指定一个挂载路径的方式来实现,如下所示:
编辑cyj.js
[root@localhost hello]# vim cyj.js
var express = require('express');
var app = express();

app.use('/static', express.static('public'));

var server = app.listen(3000, function () {
  console.log('Example app listening on port 3000!');
});
启动应用
[root@localhost hello]# node cyj.js
Example app listening on port 3000!访问http://192.168.1.1:3000/static/hello.html
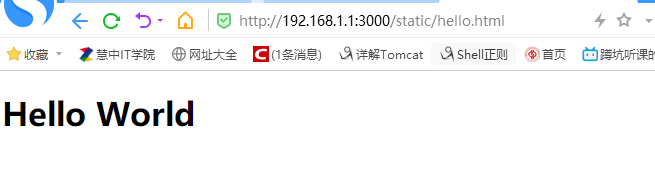
成功
博客内容遵循 署名-非商业性使用-相同方式共享 4.0 国际 (CC BY-NC-SA 4.0) 协议
本文永久链接是:https://www.feiyiblog.com/2020/04/28/CentOS%E6%90%AD%E5%BB%BAExpress-Node-js-Web/