CentOS搭建PySpider爬虫服务

PySpider 是一个国人编写的强大的网络爬虫系统并带有强大的WebUI。采用 Python 语言编写,分布式架构,支持多种数据库后端,强大的 WebUI 支持脚本编辑器,任务监视器,项目管理器以及结果查看器。 本教程将一步一步指引您搭建属于您自己的 PySpider 爬虫服务。
环境准备
更新一下主机中的软件包(耐心等待)
[root@localhost ~]# yum -y update安装开发编译工具
[root@localhost ~]# yum -y install gcc gcc-c++安装所需依赖包
如果提示 ,没有可用软件包 python-pip
输入
yum -y install epel-release,这个软件包会自动配置yum的软件仓库再次执行
yum -y install python-pip
[root@localhost ~]# yum -y install python-pip python-devel python-distribute \
libxml2 libxml2-devel python-lxml libxslt libxslt-devel openssl openssl-devel
升级pip
[root@localhost ~]# pip install --upgrade pip
...
      Successfully uninstalled pip-8.1.2
Successfully installed pip-20.0.2
该步骤可选,但为了部署的稳定性,推荐执行
部署mariadb
[root@localhost ~]# yum -y install mariadb-server mariadb启动服务
[root@localhost ~]# systemctl start mariadb设置root密码
[root@localhost ~]# mysqladmin -u root password "123.com"授权本地可登录,检查是否可以登录mysql成功
[root@localhost ~]# mysql -uroot -p123.com
MariaDB [(none)]> grant all on *.* to 'root'@'localhost' identified by '123.com';
MariaDB [(none)]> SHOW DATABASES;
+--------------------+
| Database           |
+--------------------+
| information_schema |
| mysql              |
| performance_schema |
| test               |
+--------------------+
4 rows in set (0.00 sec)
部署redis
下载redis稳定版本的源码包
[root@localhost ~]# wget http://download.redis.io/redis-stable.tar.gz解压安装包
[root@localhost ~]# tar zxf redis-stable.tar.gz
[root@localhost ~]# mv redis-stable /usr/local/redis
编译安装
[root@localhost ~]# cd /usr/local/redis
[root@localhost redis]# make && make install
配置redis
设置配置文件路径
[root@localhost ~]# mkdir /etc/redis
[root@localhost ~]# cp /usr/local/redis/redis.conf /etc/redis/redis.conf
修改配置文件
[root@localhost ~]# vim /etc/redis/redis.conf
# 修改daemonize为yes,运行后台运行
启动redis
[root@localhost ~]# /usr/local/bin/redis-server /etc/redis/redis.conf部署pyspider
安装依赖
[root@localhost ~]# pip install --upgrade chardet
...
      Successfully uninstalled chardet-2.2.1
Successfully installed chardet-3.0.4
[root@localhost ~]# easy_install mysql-connector==2.1.7
# 这里时间较长
...
Finished processing dependencies for mysql-connector==2.1.7
[root@localhost ~]# easy_install redis
...
Finished processing dependencies for redis
# 不知道为啥这里就得用pip3了
[root@localhost ~]# pip install Jinja2==2.10
...
Installing collected packages: MarkupSafe, Jinja2
Successfully installed Jinja2-2.10 MarkupSafe-1.1.1
安装pyspider
重新卸载安装的组件时因为版本问题
[root@localhost ~]# pip uninstall flask
[root@localhost ~]# pip install flask
[root@lcoalhost ~]# pip uninstall werkzeug
[root@lcoalhost ~]# pip install werkzeug==0.16.1
[root@localhost ~]# pip install pyspider
...
    Running setup.py install for pyspider ... done
Successfully installed pyspider-0.3.10
配置pyspider
创建配置文件目录
[root@localhost ~]# yum -y install npm
[root@localhost ~]# npm init -f
[root@localhost ~]# npm -y install phantomjs-prebuilt
[root@localhost ~]# npm -y install phantomjs
[root@lcoalhost ~]# ln -s /root/node_modules/phantomjs/bin/phantomjs /usr/local/bin
[root@localhost ~]# mkdir /etc/pyspider
[root@localhost ~]# vim /etc/pyspider/pyspider.conf.json
# 添加
{
  "taskdb": "mysql+taskdb://root:123.com@127.0.0.1:3306/taskdb",
  "projectdb": "mysql+projectdb://root:123.com@127.0.0.1:3306/projectdb",
  "resultdb": "mysql+resultdb://root:123.com@127.0.0.1:3306/resultdb",
  "message_queue": "redis://127.0.0.1:6379/db",
  "webui": {
    "username": "root",
    "password": "123.com",
    "need-auth": true
  }
}
启动pyspider(阻塞)
# 阻塞运行
[root@localhost ~]# pyspider -c /etc/pyspider/pyspider.conf.json
# 后台运行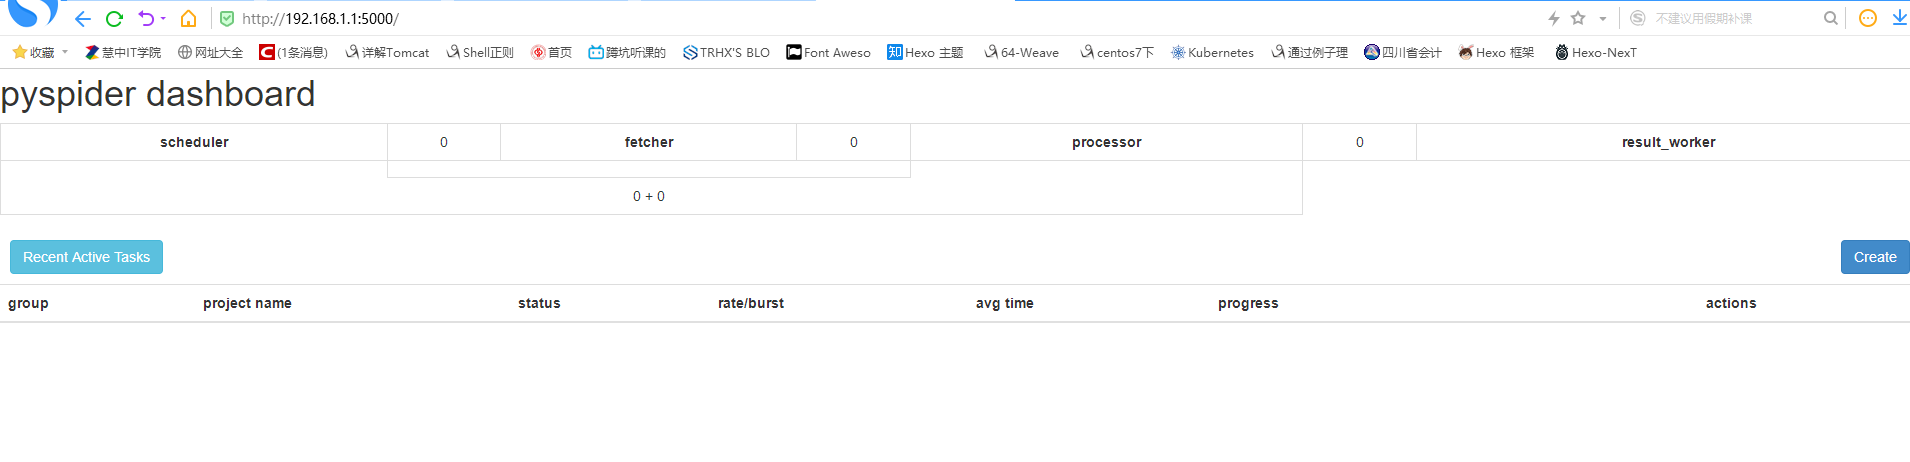
[root@lcoalhost ~]# nohup pyspider -c /etc/pyspider/pyspider.conf.json > /dev/null 2>&1 &访问:http://192.168.1.1:5000,访问页面需要输入数据库用户名密码
博客内容遵循 署名-非商业性使用-相同方式共享 4.0 国际 (CC BY-NC-SA 4.0) 协议